





Installing a surface-mount electrical socket might seem like a daunting task, but with the right tools, materials, and knowledge, it can be a manageable DIY project. As a supplier of Electrical Plugs Sockets, I've seen firsthand the importance of a properly installed socket for both safety and functionality. In this blog, I'll guide you through the step-by-step process of installing a surface-mount electrical socket, ensuring that you can complete the job with confidence.
Step 1: Gather Your Tools and Materials
Before you begin, it's essential to gather all the necessary tools and materials. Here's a list of what you'll need:
- Tools:
- Screwdriver set (both flathead and Phillips)
- Wire strippers
- Voltage tester
- Drill and appropriate drill bits
- Pliers
- Materials:
- Surface-mount electrical socket (you can choose from various types, such as Switched Socket or 13A Switched Socket)
- Mounting box
- Electrical cable (appropriate gauge for your electrical load)
- Wall plugs and screws
- Electrical tape
Step 2: Turn Off the Power
Safety should always be your top priority when working with electricity. Before you start any electrical work, turn off the power to the circuit where you'll be installing the socket. Locate your electrical panel and find the breaker that controls the circuit. Switch the breaker to the "off" position and use a voltage tester to double-check that the power is off.
Step 3: Choose the Location
Select a suitable location for your surface-mount socket. Consider the following factors:
- Accessibility: Choose a location that is easily accessible and convenient for your needs.
- Proximity to Power Source: Ensure that the location is close to an existing electrical circuit to minimize the length of the electrical cable.
- Avoid Obstructions: Make sure the location is free from any obstructions, such as furniture or appliances.
Step 4: Install the Mounting Box
Once you've chosen the location, it's time to install the mounting box. Follow these steps:
- Mark the position of the mounting box on the wall using a pencil.
- Drill holes in the wall at the marked locations and insert wall plugs.
- Align the mounting box with the holes in the wall and secure it using screws.
Step 5: Prepare the Electrical Cable
Next, you'll need to prepare the electrical cable. Follow these steps:
- Measure and cut the electrical cable to the appropriate length, leaving some extra length for flexibility.
- Use wire strippers to remove about 1/2 inch of insulation from the ends of the cable.
- Twist the exposed wires together to prevent them from fraying.
Step 6: Connect the Wires to the Socket
Now it's time to connect the wires to the socket. Follow these steps:

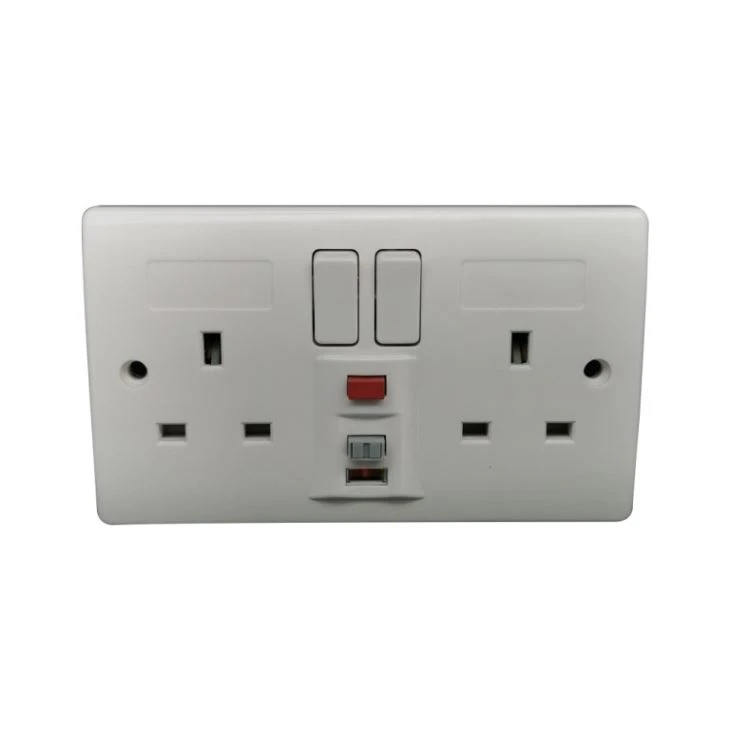
- Open the socket cover and locate the terminal screws.
- Identify the live (brown), neutral (blue), and earth (green/yellow) wires in the electrical cable.
- Connect the live wire to the live terminal screw on the socket, the neutral wire to the neutral terminal screw, and the earth wire to the earth terminal screw.
- Tighten the terminal screws securely to ensure a good connection.
Step 7: Install the Socket in the Mounting Box
Once the wires are connected, it's time to install the socket in the mounting box. Follow these steps:
- Carefully insert the socket into the mounting box, making sure the wires are not pinched or damaged.
- Align the holes in the socket with the holes in the mounting box and secure the socket using screws.
Step 8: Test the Socket
Before you turn the power back on, it's important to test the socket to ensure it's working properly. Follow these steps:
- Use a voltage tester to check for the presence of power at the socket.
- Plug in a small appliance, such as a lamp, to test the socket. If the appliance works, the socket is functioning correctly.
Step 9: Turn On the Power
If the socket passes the test, it's time to turn the power back on. Go to your electrical panel and switch the breaker back to the "on" position.
Step 10: Install the Socket Cover
Finally, install the socket cover to protect the wires and give the socket a finished look. Follow these steps:
- Align the socket cover with the socket and snap it into place.
- Make sure the cover is securely attached and there are no gaps.
Tips and Considerations
- Use the Right Socket: Choose a socket that is suitable for your electrical load and meets the relevant safety standards. For enhanced safety, consider using a Safety Power Use 250V 1 Gang 13A Switched Socket With RCD Protection 30mA & 10mA.
- Follow Local Electrical Codes: Make sure to follow all local electrical codes and regulations when installing the socket. If you're unsure, consult a qualified electrician.
- Seek Professional Help if Needed: If you're not confident in your electrical skills or if the installation involves complex wiring, it's best to seek the help of a qualified electrician.
Conclusion
Installing a surface-mount electrical socket is a relatively straightforward DIY project that can be completed with the right tools, materials, and knowledge. By following the steps outlined in this blog, you can ensure a safe and successful installation. If you have any questions or need further assistance, don't hesitate to contact us. As a leading supplier of Electrical Plugs Sockets, we offer a wide range of high-quality products to meet your needs. Whether you're looking for a simple switched socket or a socket with advanced safety features, we have the perfect solution for you. Contact us today to discuss your requirements and explore our product range.
References
- Electrical Installation Guide, National Electrical Code
- DIY Electrical Projects Handbook, Home Improvement Association


